ReactivePropertyの使い方を学習していきます
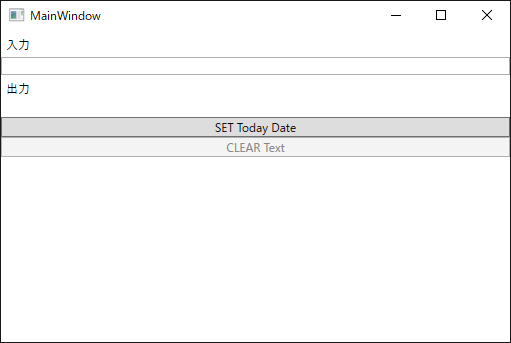
画面

コード
[MainWindowViewModel.cs]
using Reactive.Bindings;
using System;
using System.Linq;
using System.Reactive.Linq;

namespace ReactivePropertySample
{
    class MainWindowViewModel
    {
        public ReactiveProperty<string> Input { get; private set; }
        public ReactiveProperty<string> Output { get; private set; }
        public ReactiveCommand ClearCommand { get; private set; }
        public ReactiveCommand SetCommand { get; private set; }

        public MainWindowViewModel()
        {
            // ViewModelクラスのコンストラクタでReactiveProperty間の関連を定義

            // ReactivePropertyを作成する基本的な方法は、以下の2つ
            // 1. new演算子を使って生成する
            //    コンストラクタの引数にデフォルト値を指定する。指定しない場合は、その型のでデフォルト値が使われる)
            // 2. IObservable<T> に対してToReactiveProperty拡張メソッドを呼ぶ
            this.Input = new ReactiveProperty<string>(""); // デフォルト値を指定してReactivePropertyを作成
            this.Output = this.Input
                .Delay(TimeSpan.FromSeconds(1)) // 1秒間待機して
                .Select(x => x.ToUpper()) // 大文字に変換して
                .ToReactiveProperty(); // ReactiveProperty化する


            // CommandのExecuteが呼ばれたときの処理はSubscribeメソッドで指定します。
            // 先ほど作成したViewModelのInputプロパティが空じゃないときに、Inputプロパティを空にするCommandを追加したコードは以下のようになります。
            this.ClearCommand = this.Input
                .Select(x => !string.IsNullOrWhiteSpace(x)) // Input.Valueが空じゃないとき
                .ToReactiveCommand(); // 実行可能なCommandを作る

            // Commandの動作を定義する
            this.ClearCommand.Subscribe(_ => this.Input.Value = "");


            // 現在の日付を取得する
            DateTime dtToday = DateTime.Today;

            // 実行可能なCommandを生成する
            this.SetCommand = new ReactiveCommand();

            // Commandの動作を定義する
            this.SetCommand.Subscribe(_ => this.Input.Value += dtToday.ToString());
        }
    }
}
[MainWindow.xaml]
<Window x:Class="ReactivePropertySample.MainWindow"
        xmlns="http://schemas.microsoft.com/winfx/2006/xaml/presentation"
        xmlns:x="http://schemas.microsoft.com/winfx/2006/xaml"
        xmlns:d="http://schemas.microsoft.com/expression/blend/2008"
        xmlns:mc="http://schemas.openxmlformats.org/markup-compatibility/2006"
        xmlns:local="clr-namespace:ReactivePropertySample"
        mc:Ignorable="d"
        Title="MainWindow" Height="350" Width="525">

    <Window.DataContext>
        <local:MainWindowViewModel/>
    </Window.DataContext>

    <StackPanel>
        <Label Content="入力" />
        <TextBox Text="{Binding Input.Value, Mode=TwoWay, UpdateSourceTrigger=PropertyChanged}"/>
        <Label Content="出力" />
        <TextBlock Text="{Binding Output.Value}"/>
        <Button Content="SET Today Date" Command="{Binding SetCommand}" />
        <Button Content="CLEAR Text" Command="{Binding ClearCommand}" />
    </StackPanel>
</Window>
他のファイルは変更ありません。
ReactivePropertyの勉強は以下のサイトがおすすめです。
MVVMとリアクティブプログラミングを支援するライブラリ「ReactiveProperty v2.0」オーバービュー blog.okazuki.jp
MVVMをリアクティブプログラミングで快適にReactivePropertyオーバービュー blog.okazuki.jp